What Makes Breadcrumbs Stick Better? Expert Tips & Techniques
Discovering the secret to perfect breadcrumb adhesion can elevate your cooking skills to a whole new level. Whether you’re preparing crispy chicken cutlets, fried fish, or eggplant parmesan, knowing how to ensure your breading stays put is key. This article delves into every detail you need, from the science behind binding to the best techniques and troubleshooting methods. By the end, you’ll have a comprehensive understanding of how to create dishes with crunchy, golden breading that never disappoints.

Part 1: Understanding the Importance of Proper Breading Adhesion
When it comes to breading adhesion, the importance of getting it right can’t be overstated. A well-breaded dish not only enhances flavor and texture but also ensures that every bite offers a satisfying crunch. But why is it such a challenge to make breadcrumbs stick better? Let’s uncover the role proper adhesion plays in culinary success.
Why Does Breading Matter in Cooking?
Breading isn’t just about aesthetics—it locks in moisture, adds a crunchy texture, and creates a protective barrier that elevates your food’s overall appeal. Without it, fried or baked items often lose their charm, appearing bland or soggy.
The Role of Adhesion in Perfect Breading
The key to perfect breading lies in how well the crumbs adhere to the surface of your food. Poor adhesion can result in patches where the coating slides off, leading to uneven cooking and disappointing textures. With the right techniques, you can solve these problems and elevate your dishes to restaurant-quality.
Common Issues with Breadcrumb Adhesion
Before diving into solutions, it’s important to identify common hurdles that may prevent breadcrumbs from sticking:
- Surface moisture: Excess water on the food’s surface prevents proper binding.
- Binder issues: Inadequate use of flour, eggs, or alternatives leads to loose breadcrumbs.
- Cooking methods: Poor temperature control during frying or baking can compromise adhesion.
How Proper Adhesion Enhances Taste and Texture
When breadcrumbs cling uniformly, they create a consistent layer that crisps up beautifully during cooking. This consistency:
- Locks in the food’s juices.
- Provides a pleasing texture contrast.
- Helps deliver even seasoning with every bite.
Part 2: The Science Behind Breading Adhesion
Mastering the art of breadcrumb adhesion starts with understanding the science behind it. Believe it or not, there’s a fascinating interplay between surface moisture, proteins, and starches that ensures your breadcrumbs stick. When you know how these elements interact, you can refine your technique and eliminate guesswork.
The Role of Surface Moisture in Breading Adhesion
Surface moisture is the foundation for breading that sticks. If the food’s exterior is too wet, the breading slides off; if it’s too dry, the crumbs won’t adhere. Achieving the right balance involves careful preparation. For example:
- Pat dry the food using paper towels to remove excess moisture.
- Lightly dampen the surface with water or a binder like egg wash to create tackiness.
This balance ensures the flour or base layer adheres properly, forming a strong initial bond.
Protein Interactions: How Eggs and Alternatives Bind Breadcrumbs
Eggs are the most common binders for breadcrumbs due to their unique protein structure. When exposed to heat, proteins coagulate, forming a strong adhesive layer that locks the breadcrumbs in place. Here’s why eggs work so well:
- They coat food evenly, filling in uneven surfaces.
- Their sticky texture ensures breadcrumbs cling tightly.
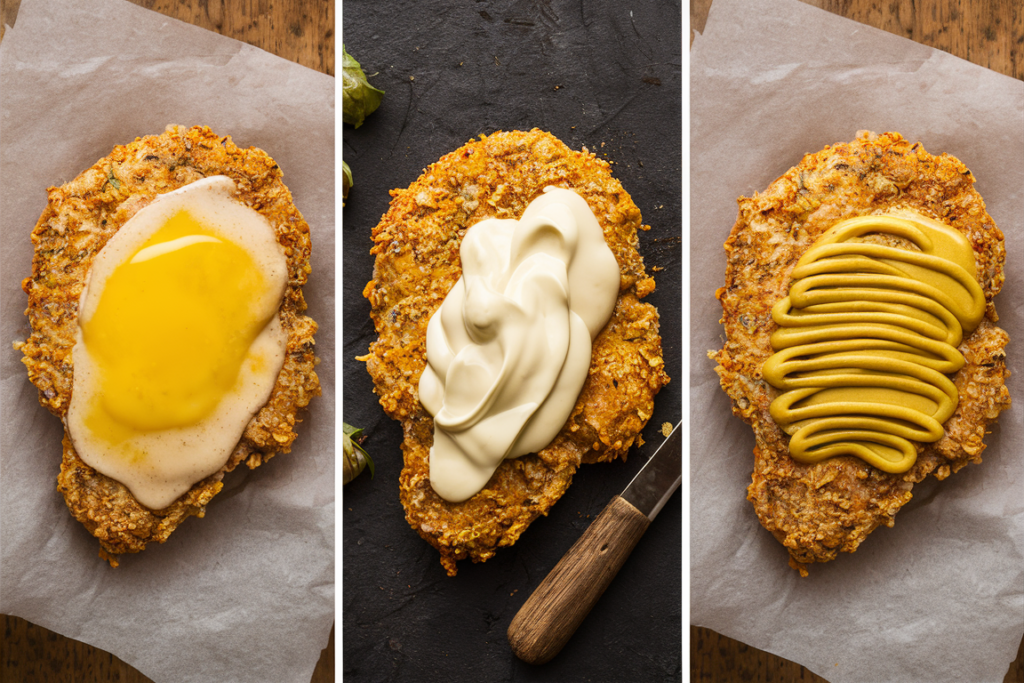
For those avoiding eggs, alternatives like buttermilk, yogurt, or even mustard can mimic this effect. These options add flavor while providing the necessary stickiness for breading.
Starch Contributions: The Function of Flour and Cornstarch Layers
Flour or cornstarch acts as the base layer in the breading process. Their primary function is to create a dry, adhesive surface for the egg wash to grip. Key tips include:
- Lightly dust the food with flour to avoid clumping.
- Use cornstarch for a lighter, crispier coating.
Flour also prevents moisture from seeping through, ensuring your breading remains intact during cooking.
Part 3: Step-by-Step Guide to Effective Breading
Knowing the science is one thing, but applying it is where the magic happens. This step-by-step guide ensures your breadcrumbs stick better while achieving a perfectly crispy, golden finish. Whether you’re breading chicken, fish, or vegetables, these practical techniques will guarantee success.
Preparing the Food Surface: Drying and Seasoning Techniques
Preparation is everything when it comes to breading. Start with a clean, dry surface to ensure the binder clings properly. Here’s how:
- Dry the surface: Use a paper towel to remove any excess moisture.
- Season the food directly: Adding salt and spices to the surface boosts flavor without relying solely on the breading.
- Avoid over-seasoning breadcrumbs: A balanced approach prevents overpowering flavors.
By starting with a well-prepped base, you’re setting the stage for even, long-lasting adhesion.
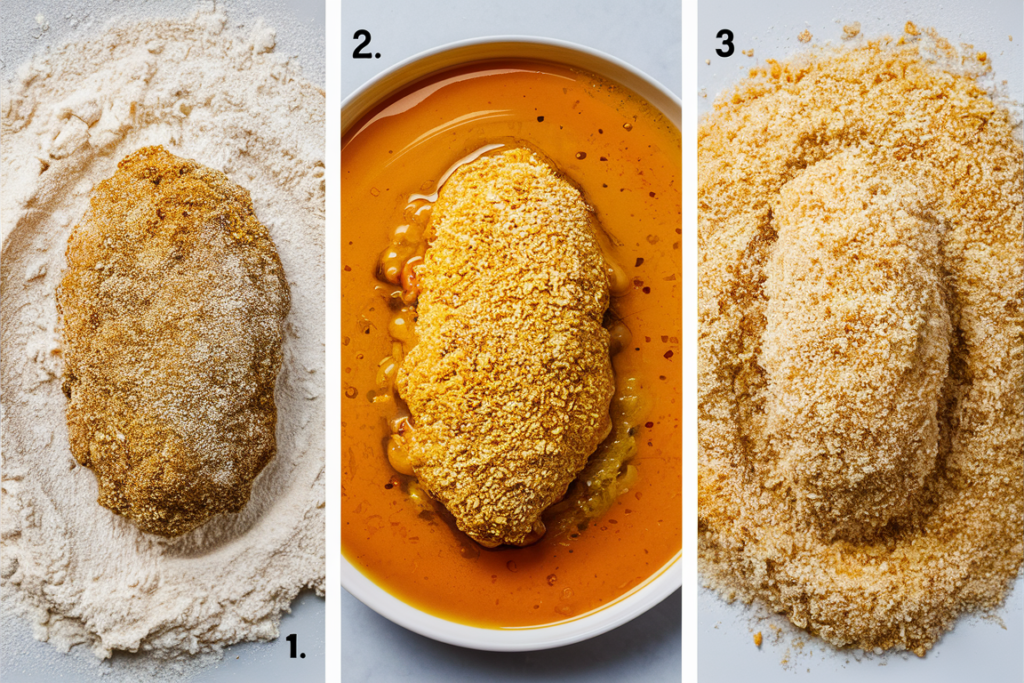
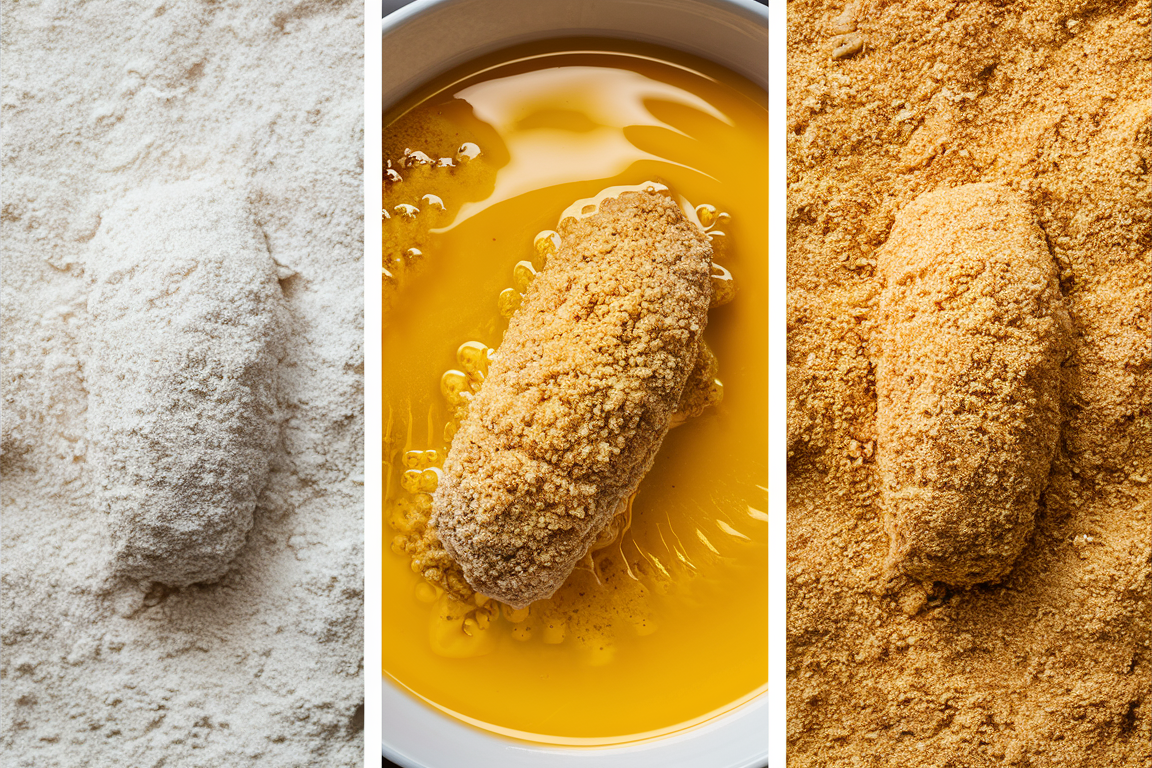
The Standard Breading Procedure: Flour, Egg Wash, and Breadcrumbs
This tried-and-true method creates a foolproof breading layer. Follow these steps:
- Dust with flour: Coat the food lightly and shake off excess to create a dry base.
- Dip in egg wash: Submerge the item in a whisked mixture of eggs and milk or water. This layer acts as glue.
- Press into breadcrumbs: Roll or press the food into the breadcrumbs until evenly coated. Use your hands to pat down for better adhesion.
For a crunchier texture, opt for panko breadcrumbs or double coat your food by repeating the egg and breadcrumb steps.
Alternative Binders: Using Mayonnaise, Mustard, or Dairy for Adhesion
While eggs are the classic binder, alternatives can add unique flavors and cater to dietary needs. Here’s how to use them:
- Mayonnaise: Brush on a thin layer to add tanginess and ensure a smooth breadcrumb layer.
- Mustard: Great for meats like chicken or pork, mustard binds and adds a zesty kick.
- Dairy products: Use buttermilk or yogurt for a mild flavor and reliable binding properties.
These alternatives not only work well but also enhance the taste profile of your dish.
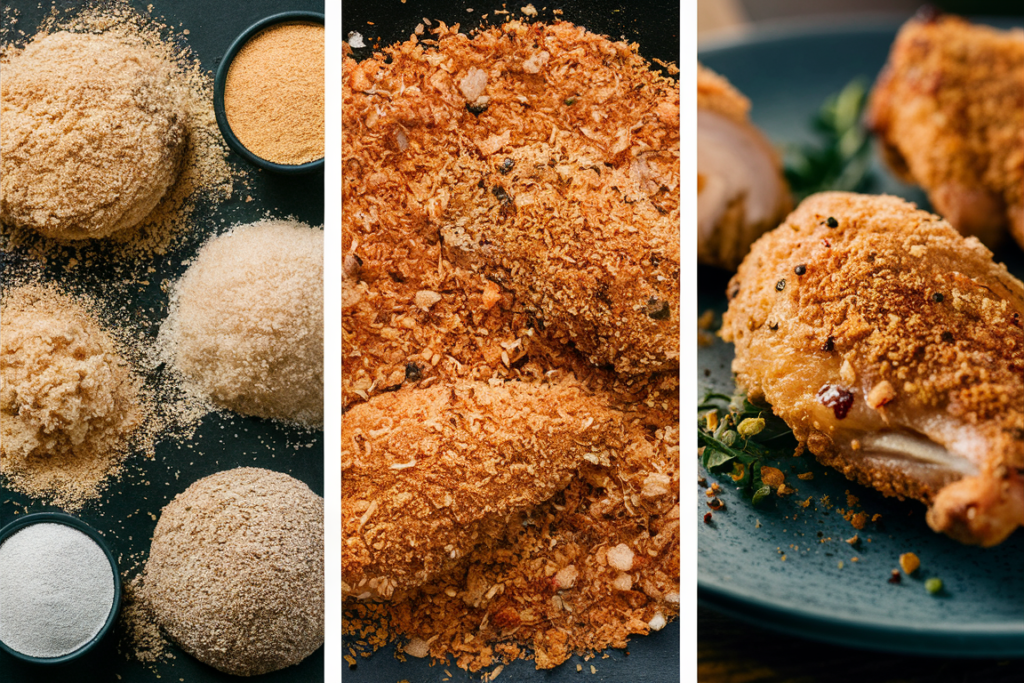
Choosing the Right Breadcrumbs: Size, Texture, and Freshness
The breadcrumbs you choose can make or break the final result. Here’s what to consider:
- Size: Finer crumbs adhere more evenly, while larger crumbs like panko provide a crunchier texture.
- Texture: Fresh breadcrumbs offer softness, while store-bought varieties are more consistent.
- Freshness: Always use fresh, dry breadcrumbs for better sticking power. Stale crumbs tend to fall off during cooking.
Part 4: Cooking Techniques to Maintain Breading Integrity
Even if you’ve nailed the preparation and breading process, improper cooking can undo all your hard work. To keep your breading intact and achieve that perfect crunch, careful attention to temperature, timing, and technique is essential. Let’s explore how to cook breaded food flawlessly.
Optimal Cooking Temperatures for Frying and Baking
Temperature control is key to preventing the breading from sliding off or becoming soggy. Whether frying or baking, here’s what you need to know:
- For frying: Maintain an oil temperature of 325°F to 375°F. Too hot, and the breading burns before the food cooks; too cool, and the breading absorbs excess oil, turning greasy.
- For baking: Preheat the oven to 400°F for a crisp texture. Baking at lower temperatures often leads to sogginess.
Using a thermometer ensures you hit the sweet spot every time.
The Importance of Resting Breaded Items Before Cooking
Allowing breaded food to rest before cooking isn’t just a suggestion—it’s a game-changer. Resting:
- Gives the breading time to adhere firmly to the binder.
- Helps the flour and egg layers fuse into a seamless coating.
- Reduces the chance of crumbs separating during cooking.
Refrigerating breaded items for 15–30 minutes can significantly improve adhesion.
Avoiding Overcrowding: Ensuring Even Cooking and Crispness
Overcrowding is a common mistake that compromises breading integrity and texture. Here’s why spacing is important:
- For frying: Overcrowding cools the oil, leading to uneven cooking and soggy breading. Fry in small batches for consistent results.
- For baking: Ensure pieces aren’t touching on the baking sheet. Air circulation is crucial for crisping the outer layer.
Use a wire rack during baking to elevate the food, allowing hot air to reach all sides evenly.
Pro Tip: Use the Right Utensils
The tools you use during cooking also play a role in maintaining breading integrity:
- Use tongs or a slotted spoon for turning items gently without scraping the coating.
- Opt for non-stick pans or parchment paper during baking to prevent sticking.
Part 5: Troubleshooting Common Breading Issues
Even with the best preparation and cooking techniques, things can sometimes go awry. If your breading doesn’t stick or crisps unevenly, don’t worry—there’s always a fix. This section explores the most common breading problems and how to solve them.
Preventing Breading from Falling Off During Cooking
Nothing’s more frustrating than carefully breading your food only to watch it slide off during frying or baking. Here’s how to avoid this mishap:
- Problem: Skipping the flour step.
- Solution: Always start with a light coating of flour to provide a dry surface for the egg wash.
- Problem: Uneven coating of egg or breadcrumbs.
- Solution: Ensure every inch of the food is coated with egg and breadcrumbs. Shake off excess flour and press breadcrumbs gently but firmly.
- Problem: Excess moisture.
- Solution: Pat the food dry before starting and avoid overusing binders like egg wash or mayonnaise.
Achieving Even Browning and Crispness
Unevenly browned breading can make a dish appear unappetizing and lead to inconsistent textures. To fix this:
- Use consistent breadcrumb texture: Opt for panko or uniformly processed breadcrumbs for better results.
- Ensure even oil coverage: For frying, make sure the food is fully submerged or turn it frequently to brown evenly. For baking, brush the breading lightly with oil or butter.
- Control heat distribution: Use a heavy-bottomed pan for frying or a convection oven for baking to maintain consistent temperatures.
Addressing Soggy Breading: Causes and Solutions
Soggy breading happens when moisture escapes from the food or the cooking method isn’t ideal. Here’s how to fix it:
- Cause: Low frying or baking temperatures.
- Solution: Stick to the recommended temperatures—325°F to 375°F for frying, and 400°F for baking.
- Cause: Overcrowded cooking surfaces.
- Solution: Leave space between items to allow steam to escape and promote crisping.
- Cause: Poor resting technique.
- Solution: Refrigerate breaded items before cooking to solidify the coating.
Pro Tip: Avoid Flipping Too Soon
When frying or baking breaded food, resist the urge to flip it too early. Let the coating set and form a golden crust before turning it. This reduces the risk of breading detachment.
Part 6: Frequently Asked Questions About Breading Techniques
Perfecting the art of breading adhesion often raises questions, especially when things don’t go as planned. Below, we answer some of the most commonly asked questions to help you troubleshoot and refine your technique.
Why does my breading fall off during frying?
The most common reasons for breading detachment include:
- Skipping crucial steps like flour dusting.
- Using excess moisture on the food surface.
- Failing to refrigerate breaded items before cooking.
To fix this, ensure you follow the standard breading process—flour, egg wash, breadcrumbs—and let the breaded food rest before frying. Also, maintain proper oil temperature to avoid disruption while cooking.
Can I use alternatives to eggs for breading adhesion?
Absolutely! Many egg substitutes work just as well, depending on your dietary needs and flavor preferences. Popular options include:
- Buttermilk or yogurt: These offer a creamy texture and tangy flavor.
- Mayonnaise: Its consistency helps breadcrumbs adhere firmly.
- Mustard: Adds a zesty kick while binding breading effectively.
These substitutes are perfect for those with egg allergies or those looking to mix things up.

How can I make breadcrumbs stick without flour?
While flour creates an essential base layer for adhesion, you can skip it with certain binders. For instance:
- Use thick egg wash or mayonnaise to compensate for the lack of flour.
- Opt for starchy coatings like cornstarch or potato starch for a similar effect.
Remember, skipping flour might result in a slightly less durable breading layer.
What type of breadcrumbs yields the crispiest coating?
Panko breadcrumbs are the top choice for achieving a light and crispy coating. They are coarser and airier than traditional breadcrumbs, which allows them to fry or bake into a delicate crunch. If you prefer a softer texture, freshly made breadcrumbs from day-old bread are another excellent option.
Is it necessary to refrigerate breaded items before cooking?
Yes, it’s highly recommended! Refrigerating breaded food for 15–30 minutes helps:
- Solidify the coating.
- Reduce the chances of crumbs falling off during cooking.
This simple step can make all the difference in achieving a uniform, sturdy breading.
How do I prevent breading from becoming soggy?
The key to preventing sogginess lies in proper cooking techniques:
- Use high temperatures (325°F to 375°F for frying or 400°F for baking) to evaporate excess moisture quickly.
- Avoid overcrowding to ensure steam doesn’t get trapped.
- Always pat the food dry before starting the breading process.
Part 7: Conclusion – Mastering the Art of Perfect Breading
Creating dishes with perfectly adhered breadcrumbs is both an art and a science. By understanding the nuances of breading adhesion and implementing the techniques shared in this guide, you can consistently achieve crispy, flavorful results.
Key Takeaways: Steps to Success
To recap the essential points:
- Begin with a dry, well-prepped surface, seasoning the food directly for enhanced flavor.
- Follow the standard breading procedure—flour, egg wash, and breadcrumbs—to create a strong, cohesive coating.
- Experiment with alternative binders like mayonnaise, mustard, or yogurt for added flavor and dietary needs.
- Choose the right type of breadcrumbs, such as panko, for the crispiness you desire.
- Pay close attention to cooking methods, avoiding overcrowding and maintaining optimal temperatures.
Troubleshooting for Perfection
Even if things don’t go perfectly at first, don’t fret! Common issues like soggy breading or uneven adhesion can be fixed with minor adjustments. Refrigerating breaded items before cooking, using consistent oil temperatures, and flipping with care all contribute to success.
Cooking with Confidence
With the insights and practical steps outlined here, you’re equipped to tackle any breaded recipe with confidence. From fried chicken to baked eggplant, your dishes will boast that irresistible crunch and golden texture every time.
Happy cooking, and may your breadcrumbs always stick!


