How to Make a Horn for a Unicorn Cake
Part 1: Introduction to Unicorn Cake Decoration
What Makes Unicorn Cakes So Popular?
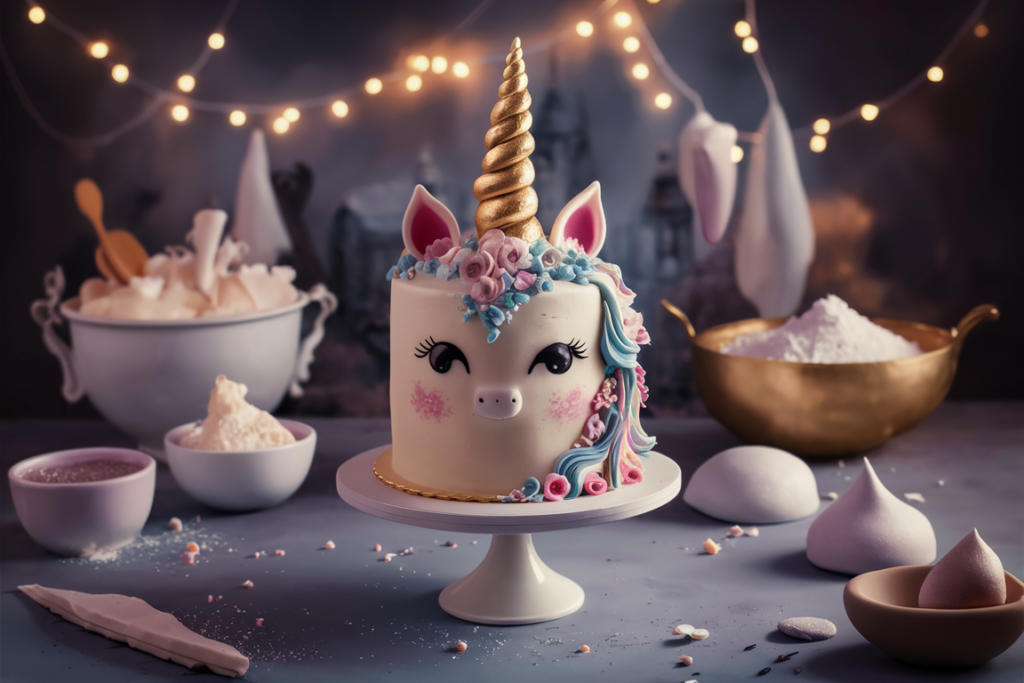
Unicorn cakes have become a baking sensation, and learning how to make a unicorn horn for a cake is the key to mastering this magical design. The horn is not just a decorative element—it’s the centerpiece that brings the entire cake to life, capturing the imagination of anyone who sees it. Whether you’re creating a whimsical birthday cake or a stunning wedding centerpiece, understanding the art of crafting a unicorn horn can elevate your cake designs to new heights.
A well-crafted unicorn horn can elevate a cake’s overall design. It adds a touch of magic and serves as the crown jewel of the decoration. Whether you are a professional baker or a hobbyist, mastering the unicorn horn is an essential skill for creating a cake that captures attention and imagination.

Importance of the Horn in Unicorn Cakes
The unicorn horn serves as the focal point, anchoring the theme of the cake. Without the horn, the design may lack cohesion and fail to evoke the desired fantasy aesthetic. A perfect horn is not only visually stunning but also structurally stable, ensuring it stays upright throughout the event.
Materials Needed for Making a Unicorn Horn
Edible vs. Non-Edible Materials
When creating a unicorn horn, you can choose between edible materials like fondant or modeling chocolate and non-edible options like polymer clay. Each material has its pros and cons:
- Edible Materials: Ideal for cakes meant to be fully consumed, offering a seamless experience.
- Non-Edible Materials: Better for display cakes, as they are sturdier and allow for intricate designs without worrying about taste or safety.
Essential Tools for Crafting a Unicorn Horn
Before starting, gather the necessary tools to ensure a smooth process. These include:
- Fondant or modeling chocolate
- Rolling pin
- Food-safe skewers or wires
- Edible gold dust or glitter
- Paintbrush for edible decorations
- Knife or cutting tool
Having these tools on hand will save you time and help you achieve professional results.
Choosing the Right Material
Fondant: Pros and Cons
Fondant is a versatile material that’s easy to work with and perfect for creating a smooth, polished horn. However, it can be prone to cracking if overworked or exposed to dry air. Additionally, it may not hold its shape well in humid conditions.
Modeling Chocolate: An Alternative
Modeling chocolate is a great alternative, offering a firmer texture and less risk of drying out. It’s also easier to shape intricate designs with modeling chocolate, but it can be slightly more challenging to paint or decorate compared to fondant.
Preparing the Base for the Horn
Forming the Structure: Wire vs. Skewers
The internal structure of the horn is crucial for stability. You can use:
- Wire: Flexible and strong, ideal for creating custom shapes.
- Skewers: A food-safe option that’s easier to work with but less adaptable.
Choose a structure that aligns with the horn’s size and the cake’s design.
Shaping the Spiral for the Horn
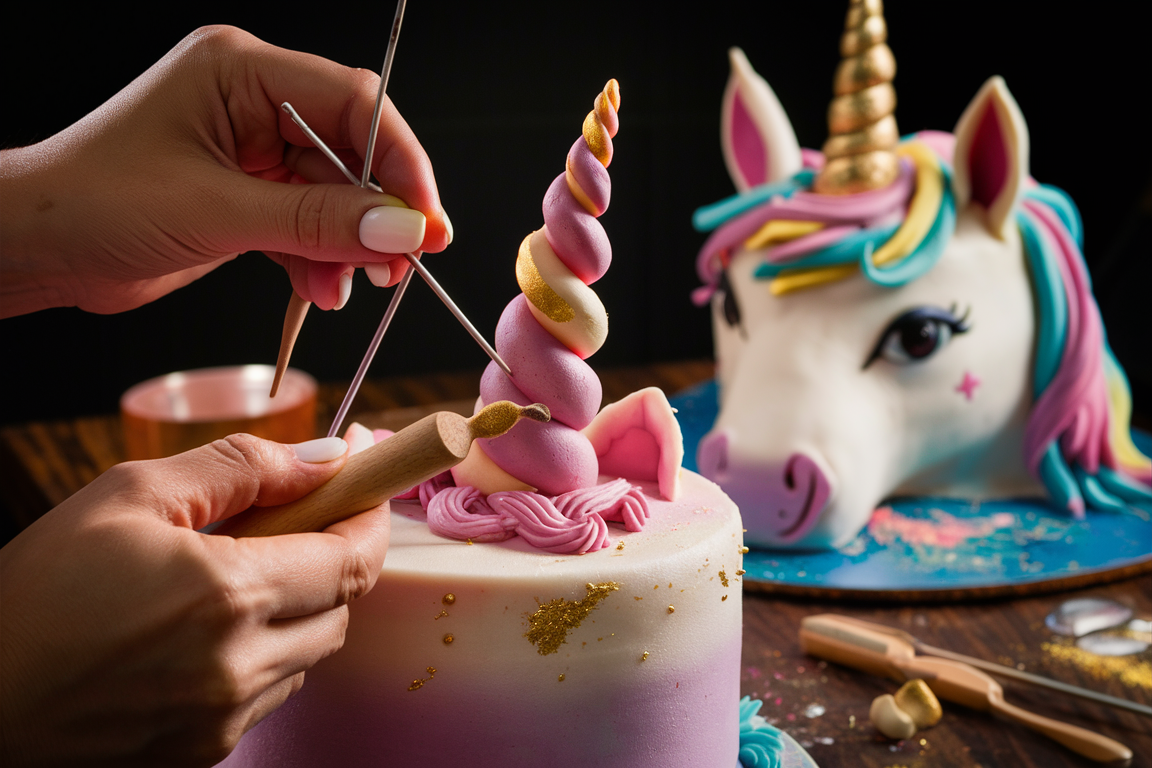
The spiral design is iconic in unicorn horns. Start by rolling out a piece of fondant or modeling chocolate into a long, even rope. Wrap the rope around your chosen base (wire or skewer) in a spiral pattern, ensuring uniform spacing between the twists.
Color and Design Ideas for Unicorn Horns
Gold, Silver, and Other Popular Colors
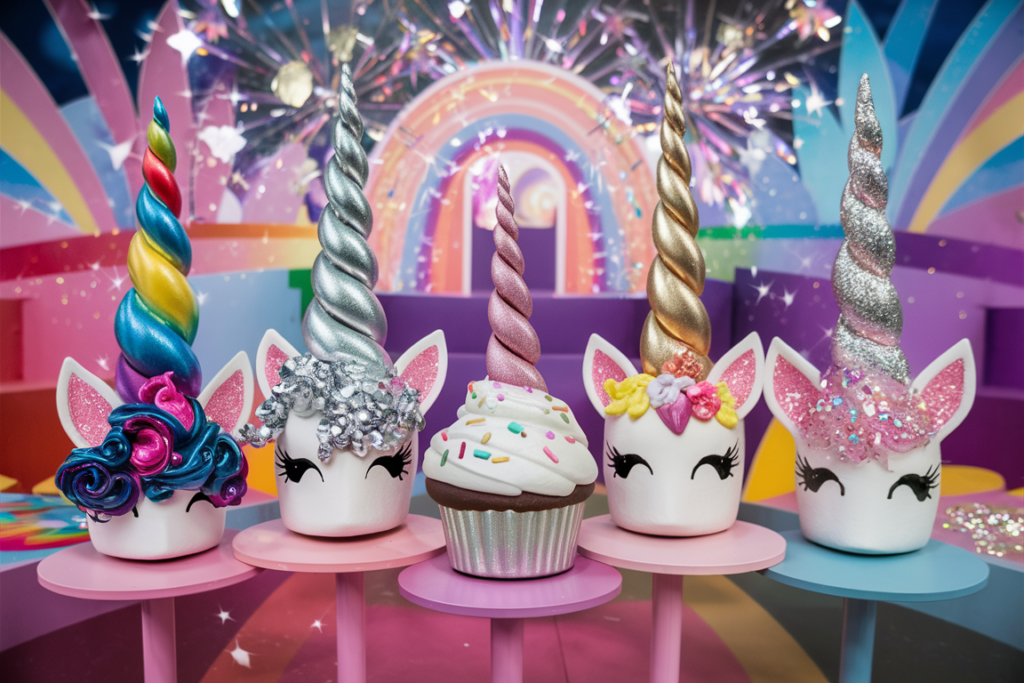
Metallic finishes like gold and silver are classic choices for unicorn horns, exuding elegance and charm. For a playful touch, pastel colors or rainbow patterns can also be used.
Adding Glitter and Shimmer for a Magical Look
Edible glitter or shimmer dust enhances the magical vibe of the horn. Apply it evenly using a small brush, ensuring a sparkling finish that catches the light beautifully.
Step-by-Step Guide to Creating a Fondant Unicorn Horn
Rolling the Fondant
- Begin by kneading the fondant until it’s soft and pliable.
- Roll it out into a long rope, ensuring even thickness throughout.
Twisting and Shaping the Horn
- Wrap the rope around the skewer or wire in a spiral shape.
- Press gently to secure the twists and smooth out any imperfections.
Part 2: Advanced Techniques for Creating a Unicorn Horn
Step-by-Step Guide to Creating a Modeling Chocolate Unicorn Horn
Preparing Modeling Chocolate
Modeling chocolate provides a durable yet malleable alternative to fondant. To prepare it:
- Melt white chocolate and mix it with corn syrup to create a pliable dough.
- Let the mixture cool and firm up for easier handling.
- Knead the dough thoroughly until it achieves a smooth consistency.
Using modeling chocolate ensures the horn retains its shape and resists cracking better than fondant.
Forming the Spiral and Adding Texture
- Roll the modeling chocolate into a rope of even thickness.
- Spiral the rope around a skewer or wire, just as with fondant.
- Use a textured tool or your fingers to add ridges or indentations for a realistic look.
Texture adds depth to the design, enhancing the horn’s visual appeal.
Techniques for Adding Realism to the Horn
Painting with Edible Dust
Edible dust, such as gold or pearl, adds a sophisticated finish. To apply:
- Mix the dust with a few drops of clear alcohol or lemon extract to create an edible paint.
- Use a fine brush to coat the horn evenly, ensuring smooth coverage.
- Allow the paint to dry before attaching the horn to the cake.
Carving Details for a Unique Look
For a custom touch, carve details into the horn using a small knife or sculpting tools. Intricate lines, dots, or floral patterns can elevate the horn to an artistic masterpiece.
How to Make a Non-Edible Unicorn Horn
Using Polymer Clay for Display Cakes
For display cakes or decorations, polymer clay offers unmatched durability.
- Shape the clay into a spiral and bake it as per the manufacturer’s instructions.
- Once cooled, the horn can be painted or coated with non-toxic materials for added flair.
Sealing and Decorating the Horn
Seal the polymer clay horn with a non-toxic sealant to give it a glossy finish. Add decorations like rhinestones or glitter for an extra magical touch.
Attaching the Horn to the Cake Safely
Choosing the Right Support Structure
Stability is key when attaching the horn. Use sturdy supports like skewers or cake dowels to anchor the horn securely in the cake.
- Insert the skewer or dowel into the horn’s base.
- Push it into the cake’s center, ensuring it doesn’t tilt.
Preventing the Horn from Tipping Over
To prevent tipping:
- Balance the horn’s weight by inserting it deeply into the cake.
- Use additional supports, such as fondant or buttercream, to secure the base.
Tips for Storing and Transporting a Cake with a Unicorn Horn
Ensuring the Horn’s Integrity
To keep the horn intact during storage:
- Store the cake in a cool, dry place to avoid softening or melting.
- If transporting, ensure the horn is packed snugly to prevent movement.
Preventing Smudging and Breakage During Transport
- Use a tall cake box to protect the horn from external pressure.
- Drive carefully, avoiding sudden stops or jerks.
Common Mistakes to Avoid
Overloading the Horn with Decorations
While glitter and embellishments are essential, overloading the horn can compromise its structure. Keep the design balanced to maintain its integrity.
Using Unstable Materials
Avoid materials that are prone to melting or breaking under pressure. Fondant and modeling chocolate work well for edible horns, while polymer clay is ideal for non-edible options.
Part 3: Creative Variations and Advanced Techniques for Unicorn Horns
Creative Variations for Unicorn Horns
Rainbow Swirl Horns
Rainbow horns are a colorful and playful alternative to the classic metallic design. To create one:
- Roll out ropes of fondant or modeling chocolate in different colors.
- Twist the ropes together to form a multicolored strand.
- Wrap the strand around a skewer or wire, ensuring the colors remain distinct.
This technique adds a vibrant, eye-catching element to your cake, making it perfect for children’s parties.
Ombre and Metallic Finishes
Ombre horns transition smoothly from one color to another, creating a magical gradient effect. To achieve this look:
- Blend two or more colors of fondant or chocolate gradually along the rope.
- Wrap the spiral as usual, ensuring the colors fade seamlessly into each other.
Metallic finishes, on the other hand, give a luxurious touch. Combine ombre with metallic paints for an advanced, sophisticated horn design.
Advanced Techniques for Expert Bakers
Using Silicone Molds for Precision
Silicone molds simplify the process of creating perfect horns:
- Fill the mold with fondant, modeling chocolate, or polymer clay.
- Press firmly to ensure all details are captured.
- Remove carefully and paint or decorate as desired.
This method is ideal for creating uniform horns for multiple cakes or cupcakes.
Creating a Hollow Horn for Lightweight Designs
A hollow horn reduces weight, making it easier to transport and attach. To create one:
- Wrap the fondant or modeling chocolate around a hollow tube or thin rod.
- Remove the tube once the horn sets, leaving a hollow center.
This technique is particularly useful for larger horns or delicate cake designs.
Incorporating the Horn into Themed Cakes
Adapting Unicorn Horns for Birthday and Wedding Themes
Unicorn horns can be customized to fit various occasions:
- Birthday Cakes: Add bright colors, confetti sprinkles, or edible gems to make the horn lively and fun.
- Wedding Cakes: Opt for subtle metallic tones like rose gold or silver, paired with floral details for an elegant touch.
Adding Complementary Decorations like Ears and Flowers
Complete the unicorn theme by adding fondant ears, edible flowers, or piped buttercream details around the horn. These elements enhance the cake’s overall design and tie the theme together.
Unicorn Horns for Mini Cakes and Cupcakes

Scaling Down the Design
For mini cakes and cupcakes, scale down the size of the horn proportionally. Use toothpicks or small skewers as the internal structure instead of full-sized dowels.
Tips for Miniature Detailing
Smaller horns require extra precision. Use fine tools to shape and decorate, ensuring the design remains clean and professional. Edible glitter and tiny floral accents are great additions to miniature horns.
Sustainable and Eco-Friendly Unicorn Horn Ideas
Using Biodegradable Materials
For environmentally conscious designs, use biodegradable or edible materials exclusively. Avoid non-recyclable decorations like plastic glitter, opting for edible alternatives instead.
Minimizing Waste During Decoration
To reduce waste:
- Measure materials carefully to avoid over-preparing fondant or modeling chocolate.
- Reuse scraps creatively for other cake decorations or accents.
Eco-friendly practices not only benefit the environment but also appeal to a growing audience of sustainability-minded customers.
FAQs About Unicorn Horn Making
- How Long Does a Fondant Horn Last?
A fondant horn can last up to a week if stored in a cool, dry place. - Can You Make a Unicorn Horn Without a Mold?
Yes, using your hands and a skewer, you can shape a spiral horn without a mold. - What is the Best Material for Edible Horns?
Fondant and modeling chocolate are the most popular options. - How Do You Prevent a Horn from Cracking?
Keep the material moist and work in a cool environment to prevent cracks. - Can I Use Edible Gold Leaf on a Horn?
Absolutely! Gold leaf adds a luxurious touch to the horn. - How Do I Fix a Broken Unicorn Horn?
Use a small amount of water or edible glue to mend cracks or breaks. - What Size Should the Horn Be?
The horn’s size should be proportional to the cake, generally 5–8 inches for full-sized cakes. - Is Modeling Chocolate Safe for Beginners?
Yes, it’s forgiving and easier to shape compared to fondant. - How Do I Attach the Horn Without Damaging the Cake?
Use a skewer or dowel, inserting it gently to avoid cracks in the cake. - Can I Make a Unicorn Horn Ahead of Time?
Yes, you can make it days in advance as long as it’s stored properly.

